Showing posts with label Exclusive Tutorial. Show all posts

Saturday, September 13, 2025

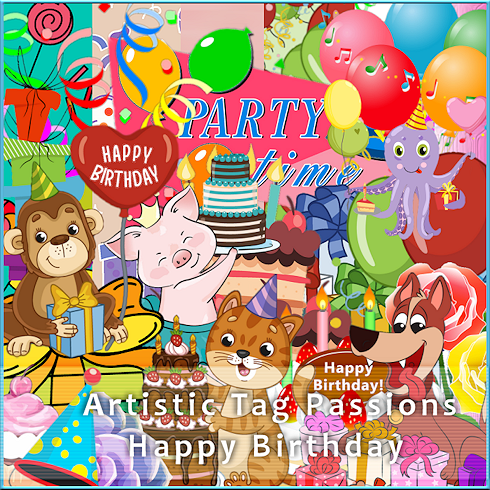
Exclusive Happy Birthday Tutorial by Pammers Passions

Pammers wrote a fun & gorgeous Exclusive tutorial.

She used an Exclusive kit for our forum called Birthday Bash by Emma of Diamond Creations
Thank you Pammers!

You can find the tutorial on her blog Here


Saturday, November 16, 2024

Soft Christmas ATP Exclusive Tutorial by Rachey

Rachey has written a gorgeous tutorial using the ATP Exclusive Soft Christmas kit
 by Wendy of  Wendez Watermark

You can only get this Exclusive Kit at Artistic Tag Passions Forum

Find it at her Tutorial site Enchanted Obsessions


Tuesday, November 12, 2024

Winter Soft ATP Exclusive Tutorial by Pammers

 Pammers has written a gorgeous tutorial using the ATP Exclusive Soft Christmas kit
 by Wendy of  Wendez Watermark

You can only get this Exclusive Kit at Artistic Tag Passions Forum

Find it at her Tutorial site Pammers Passions


Monday, November 11, 2024

Exclusive ATP Christmas Tutorial by Pammers

 Pammers has written a gorgeous tutorial using the ATP Exclusive Jolly Good Christmas kit
 by Emma of Diamond Creations

You can only get this Exclusive Kit at Artistic Tag Passions Forum

Find it at her Tutorial site Pammers Passions


Saturday, September 7, 2024

ATP Birthday Celebration Tutorial


This tutorial was written by Jules on September 7, 2024.

I used the exclusive ATP Birthday Celebration kit by Shaz at 3Tz's DesignZ
Thank you Shaz!

I used an exclusive tube by Misticheskaya called Molly.

You can only get the tube and kit at our forum Artistic Tag Passions

Birthday Word art by A Blonde Ambition Here

I used PSP 2020 but any version should work. 

Font of choice.
I used Hallo Oyster.

I used Mask WSL_535 Here
It doesn't look to be available so use a mask of your choice.

Drop Shadow of your choice.
Be sure to adjust, sharpen after resizing.

Open a new image 750 x 750.
I resized mine to a little smaller.

Paste paper 10, apply mask, delete, merge group.

Resize Frame 5 to 70, paste, click inside with your magic wand, expand by 5, paste paper 10, invert, delete, select none.

Copy and paste your tube, resize to 15.

Open element 16, crop the confetti, paste on the paper layer under the frame, resize to 70%.
Erase any showing outside of the frame.

Resize Frame 1 to 80%. Paste under the frame on the mask layer.
Move it to how you like it.

Past element 46 on the paper layer.
Erase the balloons and the bottle behind the tube.
Duplicate, move down below the paper in the frame, move to the left
Duplicate, mirror to the right.

Resize element 25 to 50%. Place above the tube on the left.
Duplicate, mirror.

Resize element 12 to 25%.
Place in front of the tube.

Resize element 21 to 20%. Place in front of the presents.

Resize element 20 to 30%.
Place next to the cake.

Resize element 36 to 60%.
Erase the balloons.
Place next to the pink and white present.

Resize element 20 to 40%.
Place behind the presents on the left.

Resize element 17 to 25%.
Place on the left in front of the presents.

Resize element 19 to 25%.
Place in front of the present on the right.

Resize element 6 to 40%.
Place behind the tube on the right.

Resize element 35 to 60%.
Place behind the tube on the left. 
Duplicate, image mirror.

Resize element 53 to 10%.
Free rotate, right 45.
Place to the left of the Happy Birthday card and the cake.
Image mirror, place on the left of the 3 cupcakes.

Resize element 48 to 10%
Place on the right of the card.
Duplicate, image mirror.
Place to the left in front of the present.
Duplicate, place in front of the cupcake.

Resize element 37 to 13%
Place in front of the birthday card.

I resized the Word Art and placed on the top.

Add your copyright and name.

Save in PNG format.

I created an avatar to go with it.
No tutorial for that.

Thank you for trying my tutorial!

Saturday, November 27, 2021

Exclusive ATP Christmas Tutorial by Shaz at 3Tz's DesignZ


 This tut was written November 27th, 2021 for those with a basic knowledge of psp. 
I am using the awesome artwork of Anna Liwanag
The tube is "131-2" 
You need a license to use this tube, do not use without a license.
You can find this tube at CDO store HERE

I used PSP2020...but any of them should work.
Exclusive ATP Christmas by Designz by Shelly HERE
You can earn this kit at ATP by earning Gems.
RD Mask 827 HERE
Check out the rest of the Blog HERE

Filter
xero-Bad Dream
Mura Meister Copies-Encircle

Font of choice, I used Reindeer Christmas

Drop shadow is V -1 H -4, 40, 10, color Black or use what you prefer.

Let's get started


*Remember to add your drop shadow as you go along*


Open a new image 800 x 800, paste paper 32, apply your mask, delete, merge group.
Duplicate, mirror. adjust when finished with your tag.

Resize frame 3 to 75%, paste, flip, mirror.
Click inside the frame, expand by 5, paste paper 17 or one of choice, invert, delete, keep selected.
Paste your tube, delete, select none.
(Optional) Apply the xero filter-Bad Dream to the tube.

Resize Christmas holly 1 to 30%, free rotate to the right at 90 degrees,
apply Mura Meister Copies-Encircle, first number on 26, the second two numbers on 48, move below the paper layer of the frame.
Paste wreath 4 below that circle, resize to 92%.
Paste wreath 1 below that wreath, resize to 95%, flip, erase the bow showing at the bottom.

Resize flower 2 to 5o%, paste on the frame on the left, duplicate, mirror.
Resize the Christmas Holly 1 to 50%, paste at the lower left below the flower, duplicate, mirror.
Resize the Christmas Holly 2 to 50%, paste below the first holly on the left, duplicate, mirror. move both down just a bit.
Resize candle 4 to 60%, being on the top layer paste center at the bottom.

Resize your tube to 40%, paste below the candle layer and then move the flower vine below the tube.
Again (Optional) Apply the filter xero-Bad Dream to the tube.

Resize Candy Cane with Holly 3 to 35%, paste on the left below the candles, duplicate, mirror, move down more on the right.
Resize the Christmas Rocking Bear to 25%, paste at the lower left being on the top layer.

Resize the Decorated Branch 2 to 30%, paste at the bottom below the other elements, having the ornaments showing, duplicate, mirror.
Resize elf 2 to 25%, mirror, paste at the lower right being on the top layer.
Resize Christmas presents 2 to 40%, paste on the left above the frame, duplicate, mirror, adjust behind the tube.

Resize sparkle 6 to 25%, paste on the first circle under the frame where you like, duplicate a couple of times or so and move around.

If you want to do an Avatar 
Open a new image 180 x 180, take the elements you want to use before you merge your tag.
Resize around 70 to 75%, paste how you like, merge.

Add any other elements that you would like, make it your own.
Always readjust your mask and elements how you like them before you
 merge your tag, resize, sharpen.
Crop your tag to be sure no shadows or lines are on the edges.
 Then add your copyright and name.
Hope you enjoyed doing my tut.  

Saturday, September 25, 2021

Coffee Time Exclusive Tutorial by Penny at Venomous Cherries Creations


This tutorial was written by Venomous Cherries Creations on September 15, 2021 exclusively for Artistic Tag Passions blog.
 It was written using PSPX but can easily be done in any photo program.
Please do not copy/post on any other site, claim as your own, or rip apart.
If you would like to use it in a forum/group challenge, please link to the ATP blog.
 This tutorial uses methods/ideas I have gained through the years from various sources.
Any resemblance to others is coincidental and accidental.
Thanks for trying the tutorial and I would love to see anything you make from it. venomouscreations1@gmail.com

Supplies:
 
""Passionate Patisserie" kit by PinkParadox Productions_this kit was made exclusively for Artistic Tag Passions forum and can only be obtained thru the group
Mask Of Choice
 
Filters:
Filters Unlimited 2_Photo Aging Kit
 
 
Fonts:
Mabussa
 
Abbreviations:
DS_Drop Shadow
ANL_Add NEw LAyer
EC_Eye Candy
GG_Gradient Glow
AS_Animation Shop
A/P_Copy and Paste
FF_Flood Fill
Ctrl+A_Select All
Ctrl+C_Copy
Ctrl+V_Paste
Ctrl+D_De-Select
Ctrl+E_Paste Into Selected Frame/s
 
Let's tag!
Open blank 650 x 650 image
ANL
Ctrl+A
Copy/Paste Paper 35 into selection
Ctrl+D
Apply Mask
Open Element 186
Move towards top of the mask area, placing the main part you want showing
within the mask
Apply same mask again
Repeat apply mask
Place this mask layer towards top right of bottom mask layer as shown
Copy/Paste the following elements, duplicating, mirroring, flipping, sharpening as needed:
12
18
19
20
22
23
28
62
77
111
112
123_Rotate Right slightly
154
155
171_Place directly above Element 123
Duplicate_Mirror_Flip
Place on Right side directly above Element 23
176_Rotate 90 Right_Mirror_Place on the Left as shown
Duplicate
Mirror_Rotate 90 Right_Place on the bottom Right as shown
182
Frame 1
Frame 16_Place directly on top of Element 20 as shown
Magic Wand_Select the inside opening_Expand by 3
ANL beneath frame
FF White
FU2_Photo Aging Kit_Hairs & Dust_128_128
Effects_Photo Effects_Sepia Toning_56
Copy/Paste Element 108
Re-size so it fits nicely inside frame
Invert_Delete_Ctrl+D
Sharpen each element
DS all elements_0_0_75_15_Black
Add all correct copyright information
Name_Mabussa_72_Black
DS_1_2_100_5_Black
Save as png and enjoy!


Friday, June 25, 2021

Under the Sea Exclusive Tutorial by Penny at Venomous Cherries Creations


This tutorial was written by Venomous Cherries Creations on June 08, 2021 exclusively for Artistic Tag Passions blog.
 It was written using PSPX but can easily be done in any photo program. 
Please do not copy/post on any other site, claim as your own, or rip apart. 
If you would like to use it in a forum/group challenge, please link to the ATP blog. 
This tutorial uses methods/ideas I have gained through the years from various sources. 
Any resemblance to others is coincidental and accidental. 
Thanks for trying the tutorial and I would love to see anything you make from it. venomouscreations1@gmail.com

Supplies:

Perla tube by Alex_Prihodko_tube/license currently available at PFD

"Poseidon's Passion" kit by PinkParadox Productions 
This kit was made exclusively for Artistic Tag Passions forum and is only available through the group.

Miz_Mask 342 MizTeeques Masks

Filters:

No outside filters used
 
Fonts:
Punched Stub

Abbreviations:

DS_Drop Shadow

ANL_Add New Layer

EC_Eye Candy

GG_Gradient Glow

AS_Animation Shop

A/P_Copy and Paste

FF_Flood Fill

Ctrl+A_Select All

Ctrl+C_Copy

Ctrl+V_Paste

Ctrl+D_De-Select

Ctrl+E_Paste Into Selected Frame/s 

 
Let's tag!
 
Open a blank 700x700 canvas

ANL

Ctrl+A

Copy/Paste into selection paper 14

Ctrl+D

Apply mask

C/P Element (44)

Ctrl+A, Ctrl+F, CTRL+Select_F

ANL below element (44)

C/P paper 8 into selection

Ctrl+D

C/P elements (24), (92), and (117) placing as shown

Erase any parts showing past edge of globe

Opacity of elements: 45

Close mask and any background layers you may have

Copy Merged

AS

Be sure the "Propagate Paste" button is clicked in AS

Looks like 3 sheets of paper in the top tool bar

Paste As New Animation

Effect_Insert Image Effect:


Delete frame 1

Back to PSP

C/P Frame (7) resizing so it fits nicely over the glass part of the globe

C/P the following elements, duplicating, mirroring, sharpening, and place as shown:

(3)

(60)

(63)

(72)

(74)

(78)

(79)

(86)

(107)...duplicate, move down slightly

(158)

(159)

(168)

(166)...place between the sand layers

(194)

C/P tube placing as shown

DS everything but mask: 0_0_65_15_Black

Add all correct copyright/license information

Name_ Punched Stub_size 100_#97866a

Place under tube so hand rests on the first letter

DS_2_5_50_3_Black

Once again, close background, mask, paper (8), (24), (92), (117),

and (44). (everything inside the globe should be closed)

Copy Merged

AS

Paste As New Animation

Ctrl+C

Click on the globe animation from earlier

Ctrl+E

Align everything as needed, then click the frame to set

Back to PSP

Close everything except background and mask

Copy Merged

AS

Paste As New Animation

Ctrl+L to 14 frames

Ctrl+A

Click on animation frames

Ctrl+A_Ctrl+C

Click on mask/background image

Ctrl+A_Ctrl+E

When happy with placement, click to set

View Animation. If happy with placement, save.

If not, undo and try again until satisfied.

If happy, save and enjoy!!


Sweet Mermaid Exclusive Tutorial by Pammers at Pammers Passions


Scrapkit - Poseidons Passion
Cluster - by me (Below)
Mask - your choice
Tube - Fiodorova Maria - PicsForDesign


Open cluster
Grab magic wand/point to point/trace outside the frame/invert/p25/delete/select none/pull below frame
Click bottom layer/p17/apply mask/merge group and drag below
Click top layer
E194
E166 - resize 50%
E74 - resize by 50%
E185
Position tube
E138 - resize 25%
Erase part of stem over the hand
Merge visible/crop/resize as needed/add proper copyright


Sunday, June 20, 2021

Poseidon's Passion Exclusive Tutorial by Shaz at 3Tz's DesignZ


This tut was written June 14th, 2021 for those with a basic knowledge of psp.


I am using the awesome artwork of  Sheokate
The tube is called "Eleanor" 
You need a license to use this tube, do not use without a license.
You can find this tube at Elegance Fly store HERE


I used PSPX6...but any of them should work.

Exclusive kit Poseidon's Passion, by PPP, this kit is awesome. 
This kit is an Exclusive at ATP, you will have to join to be able to get the kit.
Artistic Tag Passions Forum HERE
Artistic Tag Passions Blog HERE
DFly Mask 0017 HERE
Check out the rest of the blog HERE

Font of choice,  I used Mermaid Swash


Drop shadow is  V 0 H -4, 50, 10, or use what you prefer.

Let's get started
*Remember to add your drop shadow as you go along*

Open a new image 800 x 800 or a size you prefer, fill with white, can always resize later.
Select all, add a new layer, paste paper 55 into selection, select none.
Resize your mask larger to 125, paste, delete, merge group.
Paste element 66 on the mask layer.
Resize frame 11 to 45%, paste on the glow.

Paste element 67, move down a little.
Resize element 1 to 40%, paste on the right down some, duplicate, mirror,
move down a little more.
Resize element 103 to 85%, paste at the bottom.
Resize element 107 to 65%, paste at the bottom above the green rocks,
duplicate, move down and below the green rocks.
Resize element 170 to 75%, paste on the left below the the glowing element.
Resize element 21 to 50%, paste below the glowing element toward the left.
Resize element 159 to 60%, paste on the right.

Resize element 112 to 55%, being on the top layer, paste at the lower left, duplicate, mirror.

Resize your tube to 30%, paste above the brown rocks.

Resize element 14 to 95%, paste at the bottom above the tube.
Resize element 49 to 30%, paste on the lower left below the octopus.
Resize element 76 to 40%, paste at the lower left below the sea wordart.

Resize element 44 to 15%, paste below the octopus by the head.
Paste element 192 below the tube on the left, erase the blue frame part, duplicate, mirror.
Resize element 2 to 30%, paste at the lower left below the octopus.

Resize element 38 to 20%, paste at the lower right on the rock.
Resize element 73 to 20%, paste at the bottom right above the octopus, duplicate,
move below the octopus where ever you like.

Resize element 16 to 20%, paste on the right below the glow and grass elements.
Resize element 177 to 40%, paste on one side below the bubbles, duplicate, mirror.


Add any other elements that you would like, make it your own.
Always readjust your mask and elements how you like them before you merge your
tag, resize, sharpen.
 Then add your copyright and name.
That's it
Hope you enjoyed doing my tut.