Saturday, June 20, 2020
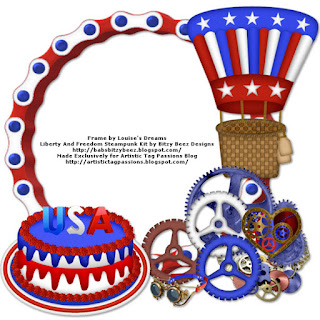
4th of July Cluster frames
Saturday, June 13, 2020
Steam Me Up FTU Tutorial
Any similarity to other works is unintentional and purely coincidental.
Please remember I am writing this tutorial as I do the tag so if anything is not clear refer to the tag illustration to confirm the intention.
~~~~~~~~~~~~~~~~~~~~~~~~~~~~~~~~
Steam Me Up
Supplies needed:
Tube of choice - I am using Steampunk 36 by VeryMany which you can get HERE
Do not use this artwork without a licence.
Scrapkit – FTU All Steamed Up by Mizteeque HERE
Masks of your choice.
I used Mask 347 and 351 png versions by Mizteeque) HERE
Font of choice.
Drop Shadow: 2,3,55,12 blur, black. Except for the main tube which is noted in the text.
No Filters.
My eraser brush settings: Default standard round brush:
Size: 50; Hardness: 50; Step: 20; Density: 100; Rotation: 0; Opacity: 25 or 30.
Don’t forget to sharpen or use the unsharp feature when re-sizing/rotating your elements/tube.
Except where noted I am working from back to front for my layering.
I am using PSP x2. Some of the effects may not be available in earlier versions.
~~~~~~~~~~~~~~~~~~~~~~~~~~~~~~~~~~~~~~
Open blank canvas 700 x 700 px, floodfill white. Resize this later.
Open masks and tube and minimise for now.
Open paper 3, copy/paste into canvas, resize 86%.
Open mask 350, copy/paste into the canvas. Move up and to the left a little then Selections/Select All/Float/Defloat/Invert and on your paper 3 background.… delete. Deselect and close off the mask layer. Delete the mask layer.
I then erased a little of this layer at the bottom.
Open paper 15, copy/paste into canvas, resize 84%.
Open mask 347, copy/paste into the canvas. Move down and to the right a little then Selections/Select All/Float/Defloat/Invert and on your paper 15 background paper.… delete. Deselect and close off the mask layer. Delete the mask layer.
Open tube, duplicate and close copy off for now, re-size 90% and move so the face is top right of the canvas. On the darker background paper, Selections/Select All/Float/Defloat/Invert and on your tube layer.… delete. I then ran my eraser brush along the bottom of the canvas to remove any odd bits of the tube.
Change blend mode on tube layer to Luminance (L) and reduce opacity to around 80%.
Open ele 39, copy/paste into canvas, resize 50%, move to the left and up a little, duplicate, mirror and move right and down a little. Merge these layers down and then erase some of the wires around the edge in a random pattern.
Open ele 36, copy/paste into canvas, resize 25%, position just left of centre. Drop shadow.
Open ele 63, copy/paste into canvas, resize 50%, position left. Drop shadow.
Open ele 44, copy/paste into canvas, resize 45%, position left, Image/Free Rotate/left 15.
Drop shadow.
Open ele 7, copy/paste into canvas, resize 35%, position left. Drop shadow.
Open ele 12, copy/paste into canvas, resize 25%, position left. Drop shadow.
Open ele 6, copy/paste into canvas, resize 50%, position right and towards
the bottom a little. Drop shadow.
Open ele 61, copy/paste into canvas, resize 30%, position right covering some of the previous layer. Drop shadow.
You should now have something like this on your canvas ……
Open the second tube layer and resize by 45%, position centrally in your canvas and towards the top a little and with your eraser tool just erase some of the bottom of the tube to soften the hard edge. Drop shadow using: -3, -3, 50, 12 blur, colour: black.
Duplicate, change the blend mode to Dodge and reduce opacity to 20%.
Time to add just a few more elements to cover the bottom of the tube.
See completed tag above for placement.
I used the following:
Ele 30 copy/paste into canvas, re-size 25%. Drop shadow
Ele 67 copy/paste into canvas, re-size 20%. Drop shadow.
Ele 15 copy/paste into canvas, re-size 20%. Drop shadow.
When you have completed that, Image/Re-size/Resize all layers checked and reduce to 88% Width and Height. Check on how it looks and make any final adjustments, add copyright and licence information then close off white background layer
For the name I used font Sacred Bridge from DA Font with a drop shadow of 2, 2, 55, 4.
Add names as required and export or save as a png file on transparent background.
Thanks for trying this tutorial out.


