Friday, June 25, 2021

Word Art Alphabet Challenge ~ V

  The following word art and tags were created as part of a challenge in our forum: Artistic Tag Passions.

All word art is saved as a PNG file. Just right click and save to your computer.

If you enjoy the word art, please leave a thank you!

We would love to see you in our forum. Come check us out.

Thanks so much to all of our members that participated this week!

***Moon***


***Penny***


***Louise***


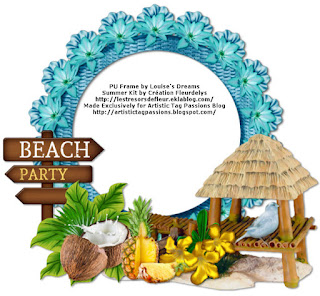
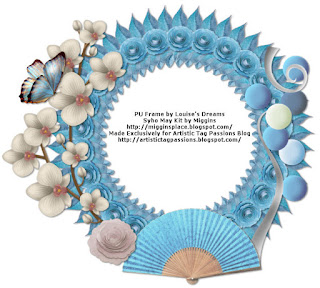
Mixed Theme Cluster Frames

 Our members created some beautiful FTU Cluster frames.

Thank you Gail, Kittie, Louise, Pammers & Shaz!

They used the following kits

Aged Crown by MizTeequees Digital Designs
Beach Summer & Summer by Tresorsdefleur
Feels Like Today by Sweet Cravings Scraps 
Let Freedom Ring by Manipulated By Magik
SYHO May Blog Train by Miggins
Twilight Wedding by Chichi Designz

Frames are in PSD format
Previews are in JPG format

Click on the Download link below each preview to download.

Please leave some passion!
A thank you goes a long way.

Enjoy!

***Gail***


***Kittie***


***Louise***

Under the Sea Exclusive Tutorial by Penny at Venomous Cherries Creations


This tutorial was written by Venomous Cherries Creations on June 08, 2021 exclusively for Artistic Tag Passions blog.
 It was written using PSPX but can easily be done in any photo program. 
Please do not copy/post on any other site, claim as your own, or rip apart. 
If you would like to use it in a forum/group challenge, please link to the ATP blog. 
This tutorial uses methods/ideas I have gained through the years from various sources. 
Any resemblance to others is coincidental and accidental. 
Thanks for trying the tutorial and I would love to see anything you make from it. venomouscreations1@gmail.com

Supplies:

Perla tube by Alex_Prihodko_tube/license currently available at PFD

"Poseidon's Passion" kit by PinkParadox Productions 
This kit was made exclusively for Artistic Tag Passions forum and is only available through the group.

Miz_Mask 342 MizTeeques Masks

Filters:

No outside filters used
 
Fonts:
Punched Stub

Abbreviations:

DS_Drop Shadow

ANL_Add New Layer

EC_Eye Candy

GG_Gradient Glow

AS_Animation Shop

A/P_Copy and Paste

FF_Flood Fill

Ctrl+A_Select All

Ctrl+C_Copy

Ctrl+V_Paste

Ctrl+D_De-Select

Ctrl+E_Paste Into Selected Frame/s 

 
Let's tag!
 
Open a blank 700x700 canvas

ANL

Ctrl+A

Copy/Paste into selection paper 14

Ctrl+D

Apply mask

C/P Element (44)

Ctrl+A, Ctrl+F, CTRL+Select_F

ANL below element (44)

C/P paper 8 into selection

Ctrl+D

C/P elements (24), (92), and (117) placing as shown

Erase any parts showing past edge of globe

Opacity of elements: 45

Close mask and any background layers you may have

Copy Merged

AS

Be sure the "Propagate Paste" button is clicked in AS

Looks like 3 sheets of paper in the top tool bar

Paste As New Animation

Effect_Insert Image Effect:


Delete frame 1

Back to PSP

C/P Frame (7) resizing so it fits nicely over the glass part of the globe

C/P the following elements, duplicating, mirroring, sharpening, and place as shown:

(3)

(60)

(63)

(72)

(74)

(78)

(79)

(86)

(107)...duplicate, move down slightly

(158)

(159)

(168)

(166)...place between the sand layers

(194)

C/P tube placing as shown

DS everything but mask: 0_0_65_15_Black

Add all correct copyright/license information

Name_ Punched Stub_size 100_#97866a

Place under tube so hand rests on the first letter

DS_2_5_50_3_Black

Once again, close background, mask, paper (8), (24), (92), (117),

and (44). (everything inside the globe should be closed)

Copy Merged

AS

Paste As New Animation

Ctrl+C

Click on the globe animation from earlier

Ctrl+E

Align everything as needed, then click the frame to set

Back to PSP

Close everything except background and mask

Copy Merged

AS

Paste As New Animation

Ctrl+L to 14 frames

Ctrl+A

Click on animation frames

Ctrl+A_Ctrl+C

Click on mask/background image

Ctrl+A_Ctrl+E

When happy with placement, click to set

View Animation. If happy with placement, save.

If not, undo and try again until satisfied.

If happy, save and enjoy!!


Sweet Mermaid Exclusive Tutorial by Pammers at Pammers Passions


Scrapkit - Poseidons Passion
Cluster - by me (Below)
Mask - your choice
Tube - Fiodorova Maria - PicsForDesign


Open cluster
Grab magic wand/point to point/trace outside the frame/invert/p25/delete/select none/pull below frame
Click bottom layer/p17/apply mask/merge group and drag below
Click top layer
E194
E166 - resize 50%
E74 - resize by 50%
E185
Position tube
E138 - resize 25%
Erase part of stem over the hand
Merge visible/crop/resize as needed/add proper copyright


Sunday, June 20, 2021

Poseidon's Passion Exclusive Tutorial by Shaz at 3Tz's DesignZ


This tut was written June 14th, 2021 for those with a basic knowledge of psp.


I am using the awesome artwork of  Sheokate
The tube is called "Eleanor" 
You need a license to use this tube, do not use without a license.
You can find this tube at Elegance Fly store HERE


I used PSPX6...but any of them should work.

Exclusive kit Poseidon's Passion, by PPP, this kit is awesome. 
This kit is an Exclusive at ATP, you will have to join to be able to get the kit.
Artistic Tag Passions Forum HERE
Artistic Tag Passions Blog HERE
DFly Mask 0017 HERE
Check out the rest of the blog HERE

Font of choice,  I used Mermaid Swash


Drop shadow is  V 0 H -4, 50, 10, or use what you prefer.

Let's get started
*Remember to add your drop shadow as you go along*

Open a new image 800 x 800 or a size you prefer, fill with white, can always resize later.
Select all, add a new layer, paste paper 55 into selection, select none.
Resize your mask larger to 125, paste, delete, merge group.
Paste element 66 on the mask layer.
Resize frame 11 to 45%, paste on the glow.

Paste element 67, move down a little.
Resize element 1 to 40%, paste on the right down some, duplicate, mirror,
move down a little more.
Resize element 103 to 85%, paste at the bottom.
Resize element 107 to 65%, paste at the bottom above the green rocks,
duplicate, move down and below the green rocks.
Resize element 170 to 75%, paste on the left below the the glowing element.
Resize element 21 to 50%, paste below the glowing element toward the left.
Resize element 159 to 60%, paste on the right.

Resize element 112 to 55%, being on the top layer, paste at the lower left, duplicate, mirror.

Resize your tube to 30%, paste above the brown rocks.

Resize element 14 to 95%, paste at the bottom above the tube.
Resize element 49 to 30%, paste on the lower left below the octopus.
Resize element 76 to 40%, paste at the lower left below the sea wordart.

Resize element 44 to 15%, paste below the octopus by the head.
Paste element 192 below the tube on the left, erase the blue frame part, duplicate, mirror.
Resize element 2 to 30%, paste at the lower left below the octopus.

Resize element 38 to 20%, paste at the lower right on the rock.
Resize element 73 to 20%, paste at the bottom right above the octopus, duplicate,
move below the octopus where ever you like.

Resize element 16 to 20%, paste on the right below the glow and grass elements.
Resize element 177 to 40%, paste on one side below the bubbles, duplicate, mirror.


Add any other elements that you would like, make it your own.
Always readjust your mask and elements how you like them before you merge your
tag, resize, sharpen.
 Then add your copyright and name.
That's it
Hope you enjoyed doing my tut.   


Saturday, June 19, 2021

Word Art Alphabet Challenge ~ U

 The following word art and tags were created as part of a challenge in our forum: Artistic Tag Passions.

All word art is saved as a PNG file. Just right click and save to your computer.

If you enjoy the word art, please leave a thank you!

We would love to see you in our forum. Come check us out.

Thanks so much to all of our members that participated this week!


*** Kittie ***


*** Louise ***


*** Moon ***


*** Sandy ***


*** Wendy ***


Saturday, June 12, 2021

Travel The World Exclusive Tutorial by Penny at Venomous Cherries Creations


This tutorial was written by Venomous Cherries Creations on June 08, 2021 exclusively for Artistic Tag Passions blog.
It was written using PSPX but can easily be done in any
photo program.
 Please do not copy/post on any other site, claim as your own, or rip apart.
If you would like to use it in a forum/group challenge, please link to the ATP blog.
This tutorial uses methods/ideas I have gained through the years from various sources.
 Any resemblance to others is coincidental and accidental.
Thanks for trying the tutorial and I would love to see anything you make from it.

Supplies:


Best Friends tube by Fiodorova_Maria currently available at PFD 
"Artistic Automaton" kit by PinkParadox Productions 
This kit was made exclusively for Artistic Tag Passions forum and is only available through the group.
My Word Art below or wording of choice


Click image, then right click and save the full size png 


Filters:
No outside filters used


Fonts:
Prefix


Abbreviations:
DS_Drop Shadow
ANL_Add NEw LAyer
EC_Eye Candy
GG_Gradient Glow
AS_Animation Shop
A/P_Copy and Paste
FF_Flood Fill
Ctrl+A_Select All
Ctrl+C_Copy
Ctrl+V_Paste
Ctrl+D_De-Select
Ctrl+E_Paste Into Selected Frame/s


Let's tag!


Open a blank 700x700 canvas
ANL
Ctrl+A
Copy/Paste into selection paper 29
Ctrl+D
Apply mask
C/P the following elements, duplicating, mirroring, sharpening, and place as shown:
(28)
(62)
(78)
(88)
(95)
(106)
(111)
(116)
(118)
(121)
(144)
(171)
(185)...place directly above mask
C/P tube placing as shown
DS everything but mask: 0_0_100_10_Black
C/P Word Art
DS_1_2_100_2_#cbb4a0
Repeat
DS_1_2_100_5_black
Add all correct copyright/license information
Name_ Prefix_size 20_#d8c6b3
Vertical and Right Selected
Blend Mode_Hard Light
Opacity_55
Save and enjoy!!